Various Projects in 3D Photography and Image-based Modeling and Rendering
 |
Course: CS 174B - Three-Dimensional
Photography and Rendering |
Course Description
State of art in three-dimensional photography and image-based rendering. How to use cameras and light to capture shape and appearance of real objects and scenes. Process provides simple way to acquire three-dimensional models of unparalleled detail and realism. Applications of techniques from entertainment (reverse engineering and post-processing of movies, generation of realistic synthetic objects and characters) to medicine (modeling of biological structures from imaging data), mixed reality (augmentation of video), and security (visual surveillance). Fundamental analytical tools for modeling and inferring geometric (shape) and photometric (reflectance, illumination) properties of objects and scenes, and for rendering and manipulating novel views.
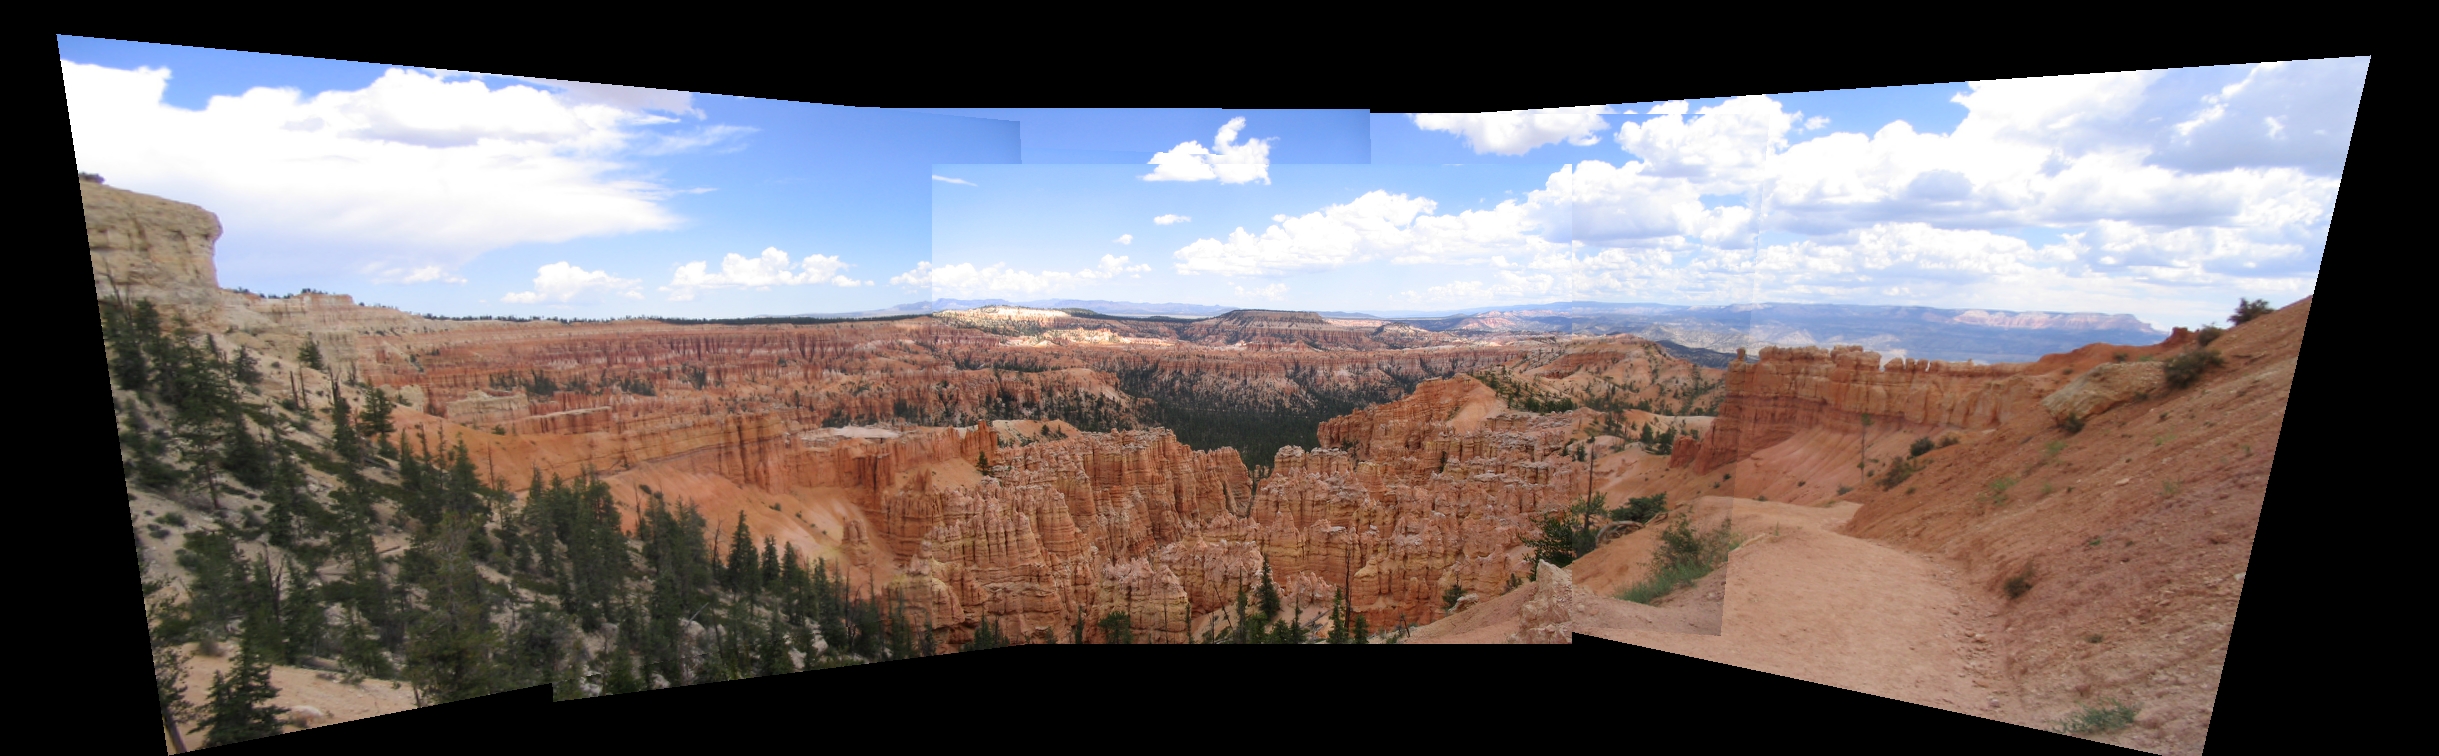
Image Mosaic |
|
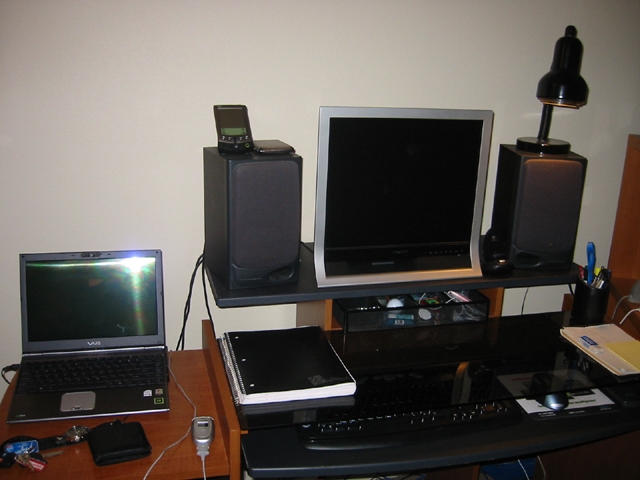
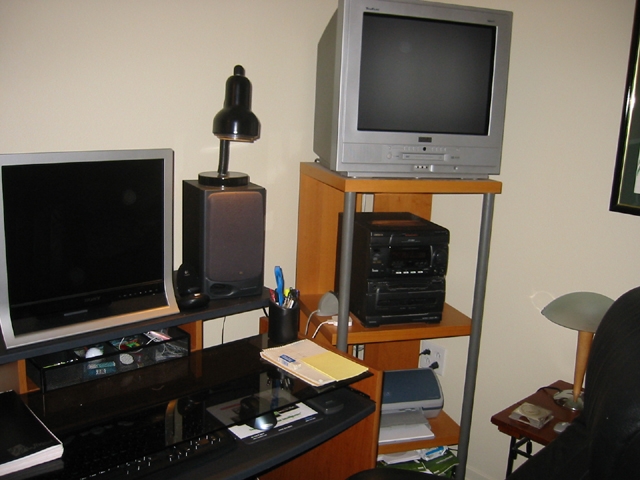
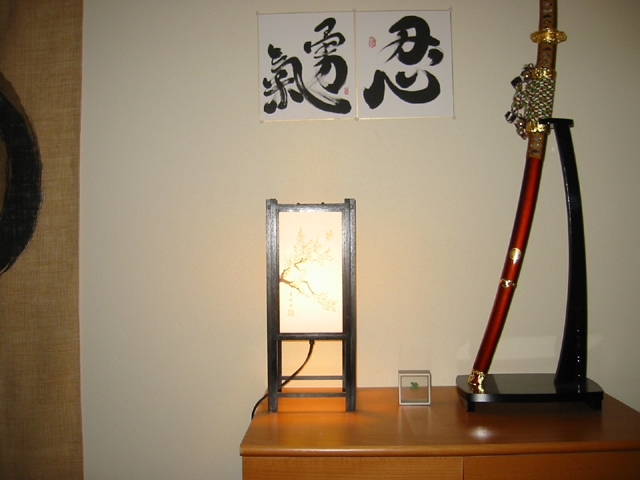
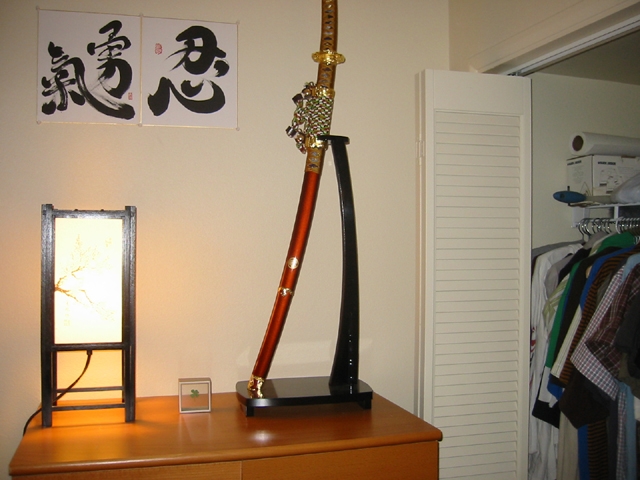
An image mosaic is a single image constructed from many smaller images, giving the appearance that the single image was taken from a larger camera. Shown to the right are two photographs of my room, taken from the same location with only a rotation. It is a requirement that imagery to be included in the mosaic must only differ by a camera rotation. The first step is to establish points of correspondence between the photos for reference. To do this, we simply click points that "match" between both images. For instance, we could select the corner of the notebook in both images, creating a pair of corresponding image points. We need at least four point pairs to properly build the mosaic. Next we build a homography, a matrix that relates the 3D space of one image to the other. We do this by constructing a matrix from the points of correspondence and computing its singular value decomposition (SVD). |
|
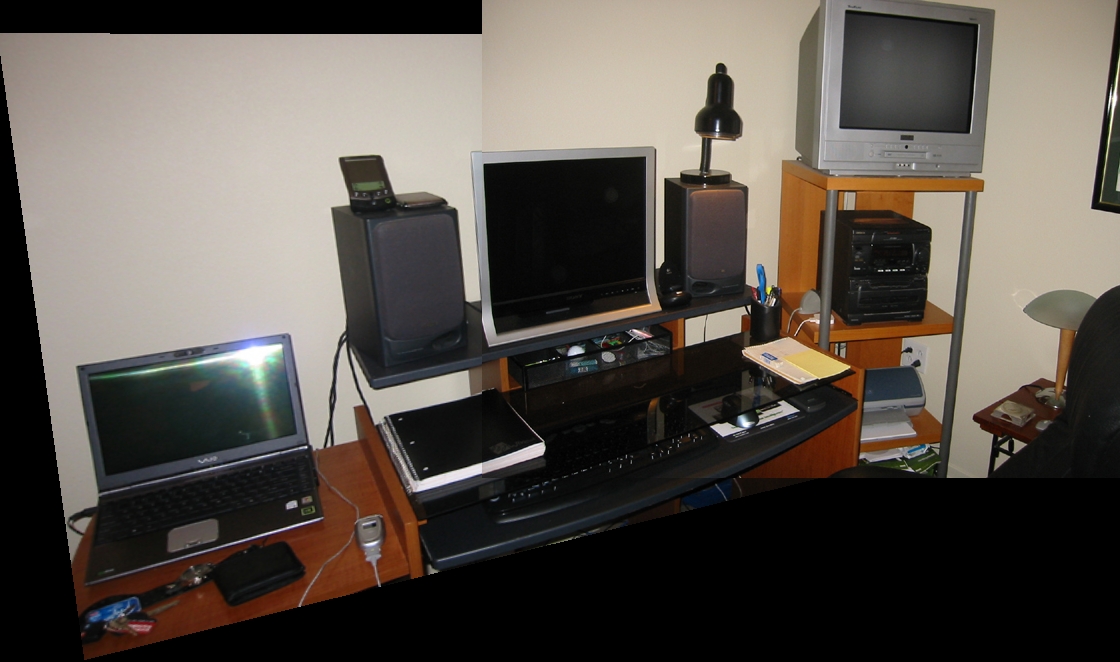
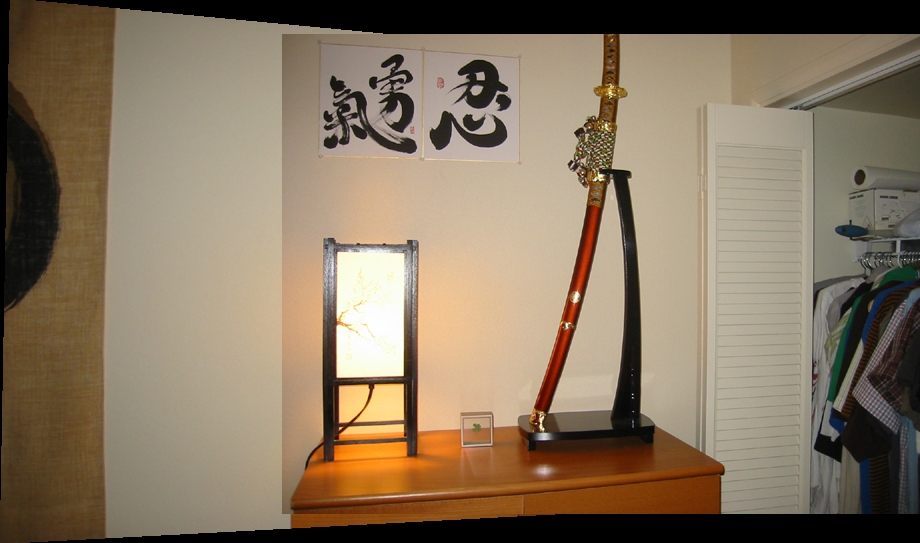
To build the mosaic, we first create an image large enough to fit both images. Next we select one image to be the reference image that will remain unmodified (the second image from my room). We perform backward mapping, a technique which scans each pixel of the mosaic image and "maps" which source image to copy the pixel from. We are able to perform this operation with the homography computed earlier. If the pixel maps to the reference image, we copy the pixel directly (hence producing no change in the reference image). If the pixel maps to the other image, we use bilinear interpolation of the image's neighboring pixels to computer an approximate pixel value. This will remove unpleasant aliasing effects in the mosaic. Below is the image mosaic of my room. Notice the first image is warped significantly to match the second image. |
|
|
Below are more image mosaic examples, including one with six images. To handle more than two images, the process is nearly identical to two images except we must compute multiple homographies between adjacent pairs of images. In order to find a homography between any two images, we can simply multiply the homographies for all adjacent images between the two we want. |
|
|
|
|
|
 (click image to enlarge) |
 (click image to enlarge) |
 (click image to enlarge) |
 (click image to enlarge) |
 (click image to enlarge) |
 (click image to enlarge) |
 (click image to enlarge) |
Match Moving |
|
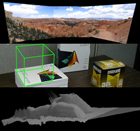
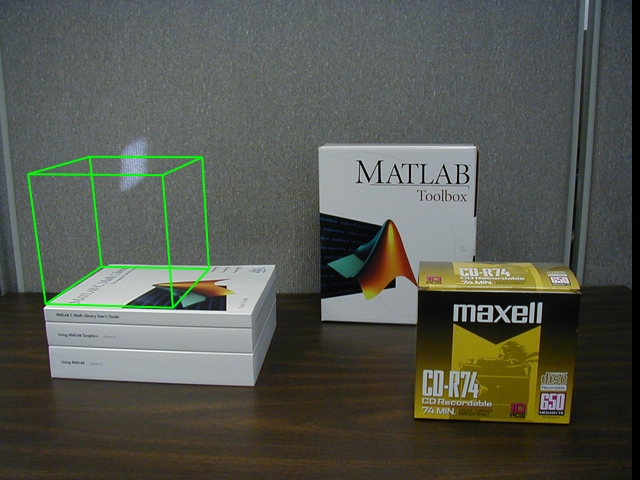
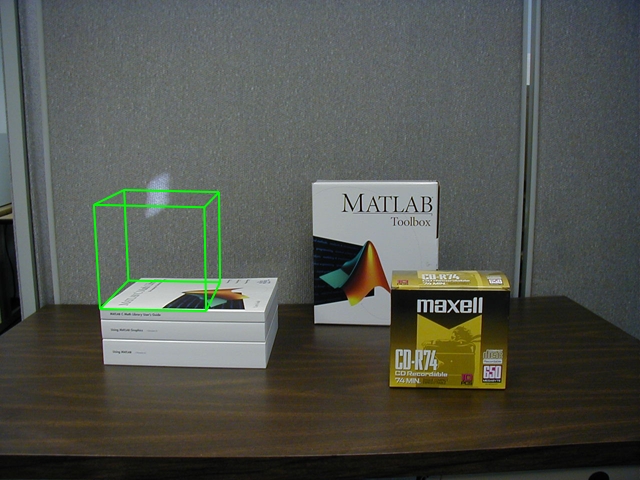
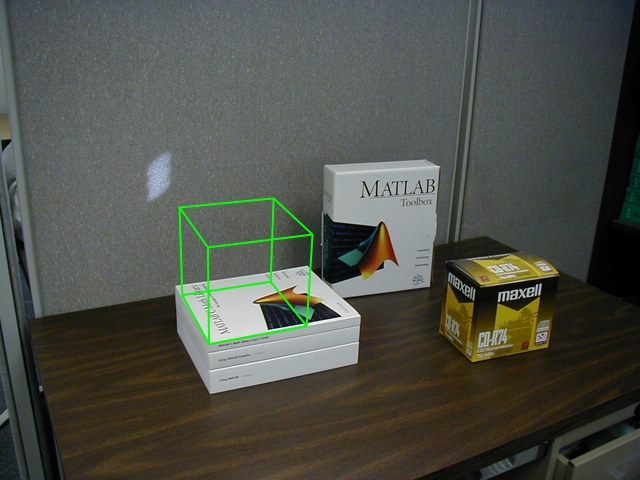
Match Moving is a special effects technique to mathematically insert a virtual object into real imagery with correct position, zoom, and orientation of the scene. This technology is used for displaying the line of scrimmage for televised football games, as well as the advertisements that display along the field. Shown to the right are three images of a scene. The goal is to insert a virtual cube object into the scene mathematically in all three images. This operation is performed between one pair of images at a time. The first step is to establish points of correspondence between two of the images. To do this, we simply click points that "match" between both images. For instance, we could select the corner of the stack of books in both images, creating a pair of corresponding image points. We need at least eight point pairs to properly perform match moving. The next step is to calibrate the camera. Given a matrix for the camera's calibration and calculating its inverse, we convert all corresponding points from pixel space to a common image plane space. We then reconstruct the camera motion. This will compute the rotation and translation of the camera between the pair of images. This process is the most mathematically involved since we must select the correct camera rotation/translation pair from four different possible scenarios (due to the ambiguity from 2D to 3D space). This disambiguation step is known as reconstructing the geometry of the scene. Lastly we insert the virtual object into the scene. We set up a cube of 8 points in its own object space. For each image, we convert each cube point from its own space into image space and then into pixel space, using the rotation/translation pair from above. Below are the three images with the virtual cube object inserted. |
|
 (click image to enlarge) |
 (click image to enlarge) |
 (click image to enlarge) |
Shadow Carving |
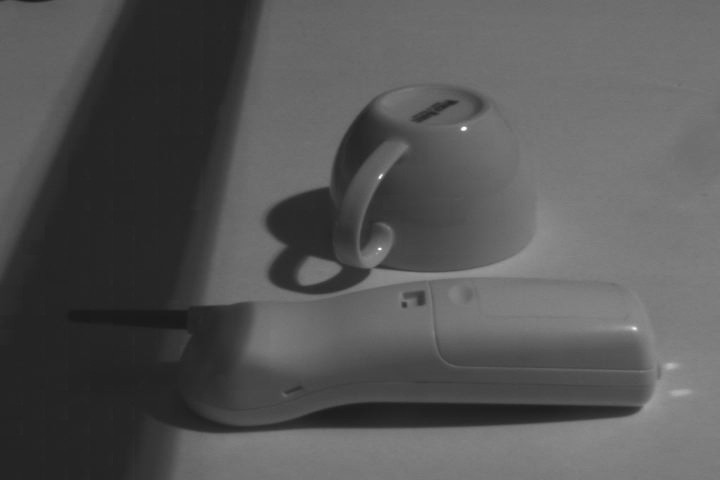
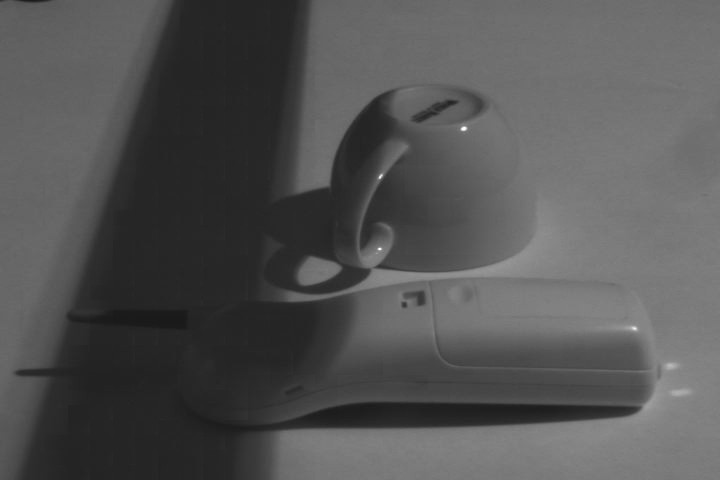
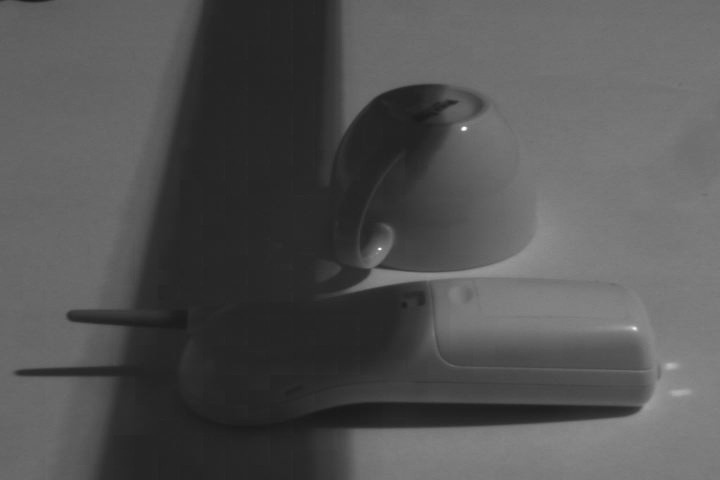
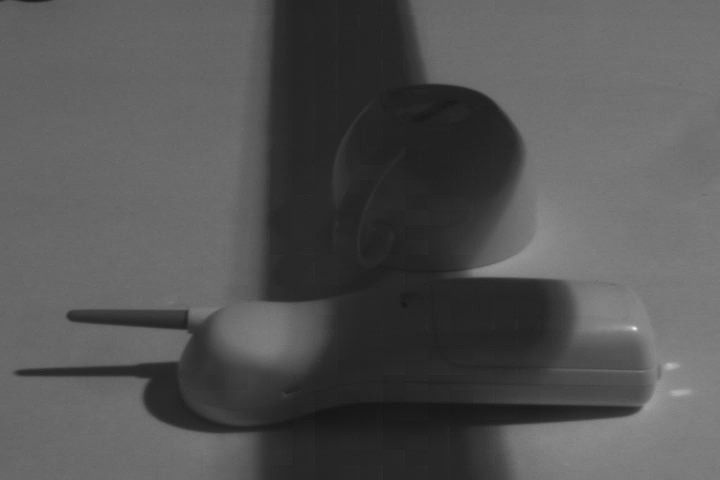
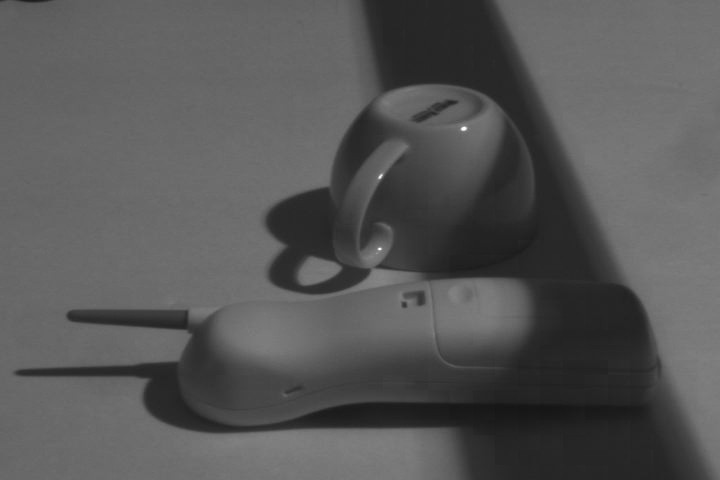
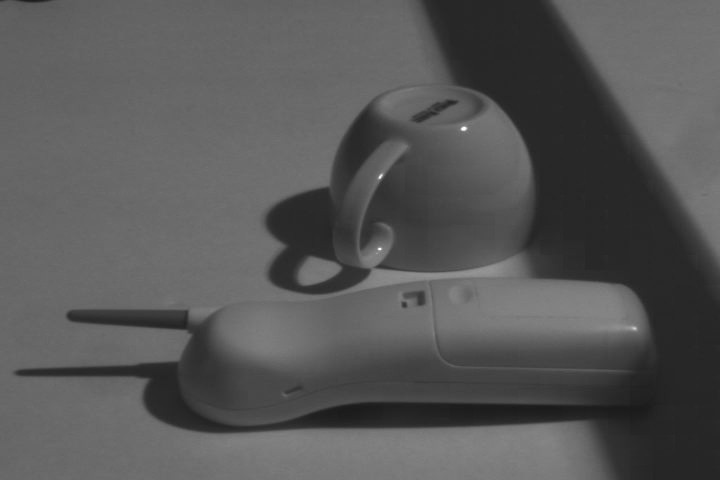
Shadow carving is a way to extract a 3D model from a series of 2D images. As the name suggests, we use a shadow over the 2D images to help us analyze the curvature of the objects and build the 3D model. Each 2D image gives us a slice of information about its 3D shape, and in this way we are "carving" out the model. Below are ten 2D images taken with large time steps over a very large sequence of images. As you can see, the shadow is progressively sweeping the scene, revealing the curvature of the mug and phone through contrast differences. The first step is to calibrate the system by determining matrices that describe the camera's calibration, rotation, and translation, and a light source relative to the table's reference frame. This data was provided for us. Next we determine various image data through a process of tracking the shadow. Since the images are black and white, our pixel values are brightness intensities (i.e. number between 0 and 255). We calculate the minimum and maximum images that store the min and max pixel values across all images. Next we build an instants of the minima image, associating with each pixel a time when it first reaches (within a threshold) its minimum value. Logically this occurs when the shadow is well over the pixel. Lastly, we calculate an image of crossing times where for each pixel we store a time when the pixel first begins to deviate from its average value, but only if it is before its instant of minima time. This gives us the exact times when the shadow hits each pixel. |
          (click image to enlarge) |
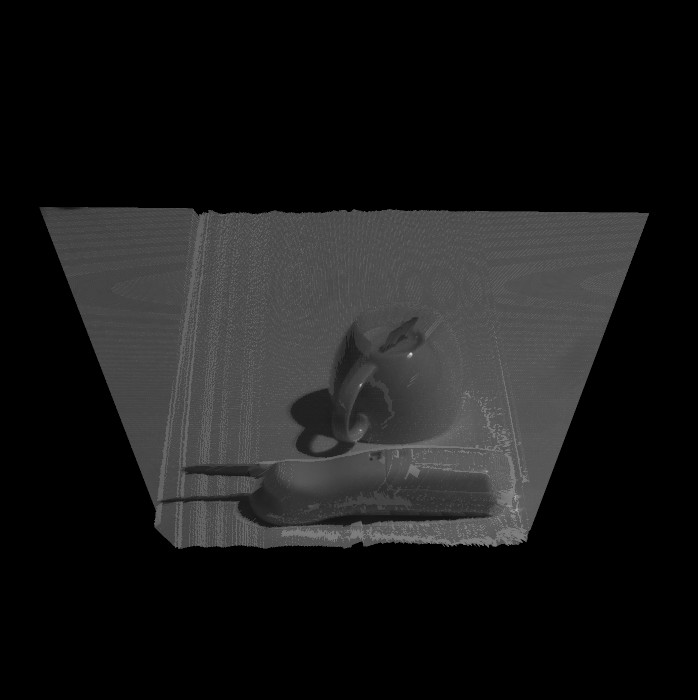
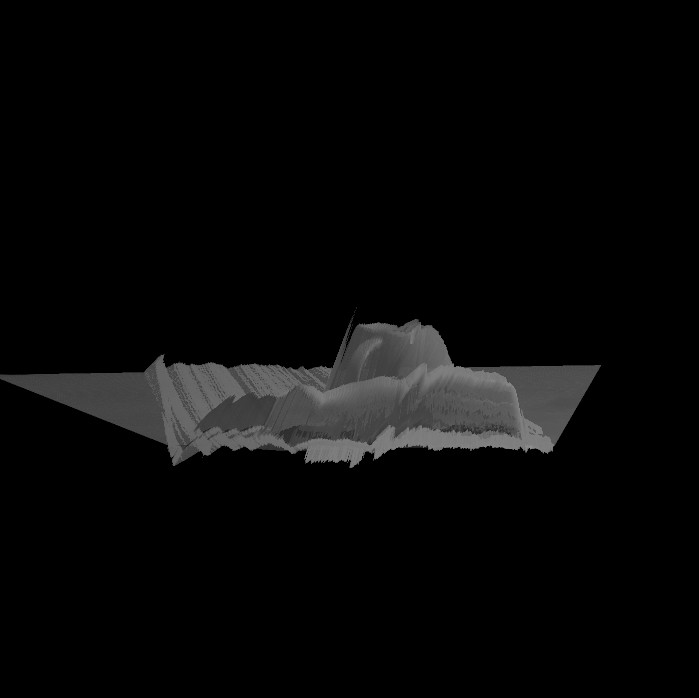
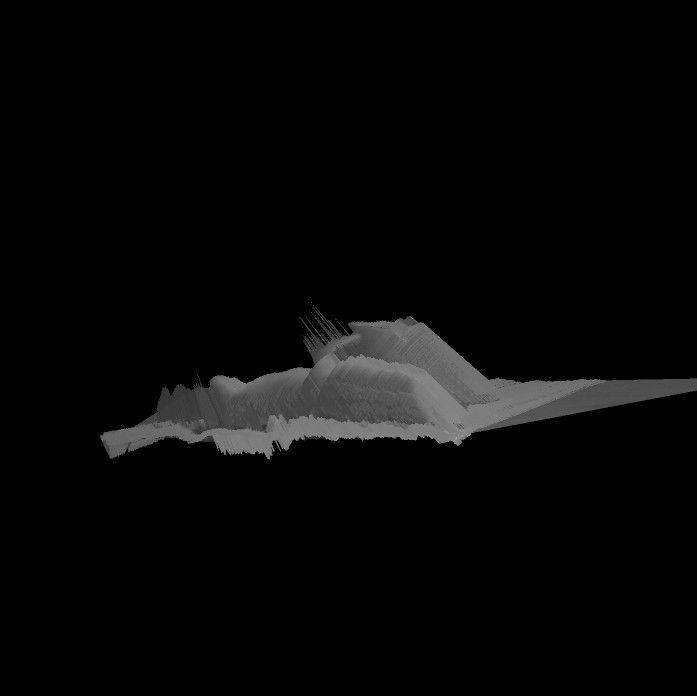
To build a 3D model from this data, we must first make sure we are only using pixels that are stable. Pixels that are unstable are those where the contrast with the shadow is not large enough (e.g. the shadow underneath the phone). We project all stable pixels to its proper place in 3D using the crossing times above. To do this, we use the knowledge we know about camera and the table plane in the calculation. We project all unstable pixels onto the table (pretending they are part of the table). Finally, we build a 3D model of triangles from all our points with copied pixel brightness values from the original image. Below are three snapshots taken of the 3D model. This process is by no means perfect, as you might notice. When approximating 3D models from 2D images, there will always be an ambiguity in the shape of the objects (i.e. what does the object look like underneath / behind?). The first image looks the best because it is from the same viewpoint as the 2D image. You'll notice from the other images that the areas of ambiguity behind the objects appear stretched out. The jagged edges are caused by noise in the data, another unavoidable side effect of the process. |
 (click image to enlarge) |
 (click image to enlarge) |
 (click image to enlarge) |